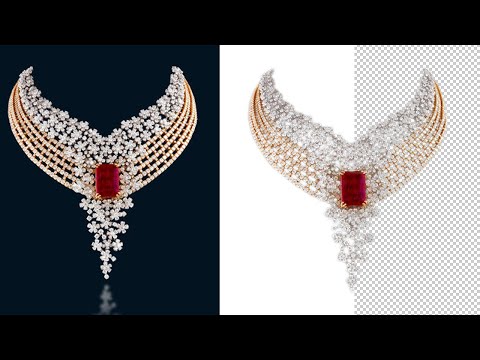
Step 1: Open the image
We know that is an obvious thing to typically open Jewelry image when editing in Photoshop, but it is essential. Besides, there are different ways you can open the photo in photoshop. And the manual and automatic are two significant processes for opening the image in Photoshop.
The automatic way is simple, move to windows, drag your required image right to Photoshop, and automatically open it. On the other hand, the manual way, open the Photoshop application, move to file, open, choose the image from windows, followed by pressing enter to open. Alternatively, you can use the hotkey “Ctrl+O” for windows and Command+O for mac.
Step 2. Select pen tool
Pick your Pen Tool right from the side menu. In essence, this specific tool icon is simple to spot; click it and choose or preferably use the shortcut “P” on the keyboard.
Step 3. Take the path
When removing the background on jewelry image’s someone should draw a perfect clipping path against the image. Besides, Photoshop is known to work on many and different layers. Thus, it suitable to take a path layer to eventually draw you’re clipping path over a specific image.
And to take the path, move to the layer panel, click path, and you will find another box. Now move down, click on the create a new path from the right next to the delete selection button, and you come across the path layer. If you can’t find the path panel then enable it from the window tab.
Step 4. Draw the path
Now that you have chosen the pen tool and taken the path, draw the path around the photo to choose it. In this case, you need to zoom in on the photo at least 200-300%, until you clearly see the edge, add anchor points, and you might wait for some minutes.
However, for some of us with images that have close boundaries, we might want to add a second path to eventually remove the background right from inside the photo boundary.
Step 5. Convert the selection
Now turn the path which you drew using the pen tool to a specific selection. And you will do this via right-clicking on the path on the panel, then click on the selection which indicates “Make selection.”
After this, you will see a detailed message box asking you about the value of feathers. Where feather means softening of image sides, thus you can select appropriate value like 0.5 or 1 followed by pressing enter or click the OK button.
Now, you can see the path selection around the product image.
Step 6. Inverse selection
Now for the individuals with the outer boundary of the photo, it might require doing this additional step once you have converted the path selection. So, move to Select menu, then click inverse, and select background, making it simple to remove it. Or you can use the shortcut keys “Ctrl+Shift+I” to inverse the selection.
After inversed,
Step 7. Duplicate the background layer
Now it very easy to eventually remove the background after step six. However, you might require duplicating the original background layer. Thus, click right on the background layer; find the selection which indicates Duplicate Layer.
And turn off the perceptibility of the original layer.
Step 8. Delete the Background
Now select the background copy layer then hit the delete button on the keyboard and remove the background on the jewelry image. Remember, repeat the same process for multiple paths, move to the inverse selection, and hit the delete button.
9. Save the image
After removing the background you should save the image on your computer. For saving the jewelry image, click File Save as Select PNG from Save as type) Save.
If you need transparent background then you should select PNG format and JPG format for white or any other color background

