Step 1
Create a new document sized 1000px * 1000px with white background. Load the stone wall texture into Photoshop and select a portion as shown below:
Copy and paste the selection onto our document, resize it to fix the document size:
Use a soft eraser with 50% flow and opacity, erase the following portions of this texture layer:
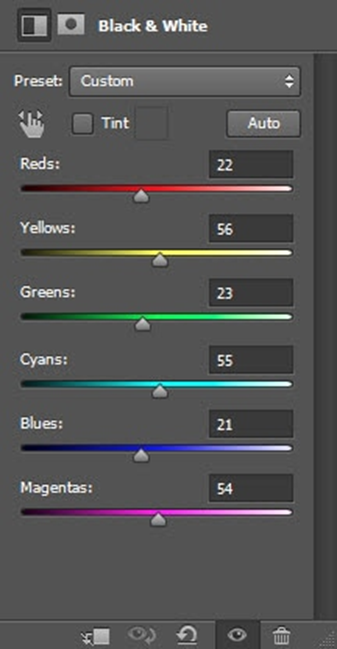
Add the following 3 adjustment layers on top of this texture layer:
Black and White
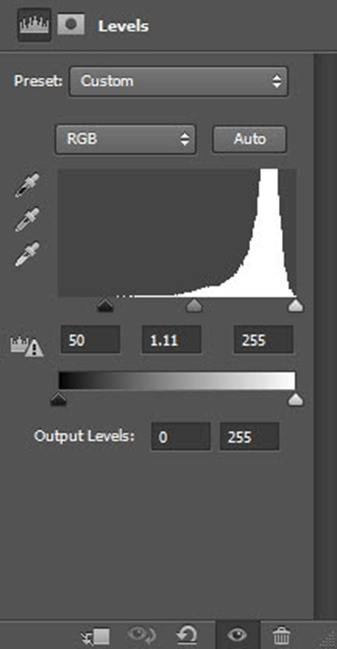
Levels
Curves
and here is the effect so far:
Step 2
Load the model image into Photoshop and cut the model out, paste it onto our document. Resize and position it as shown below:
Apply the following Surface Blur filter to this model layer:
Use a combination of soft and hard brush, as well as the debris brush, apply the following layer mask on this model layer:
and here is the effect so far:
Step 3
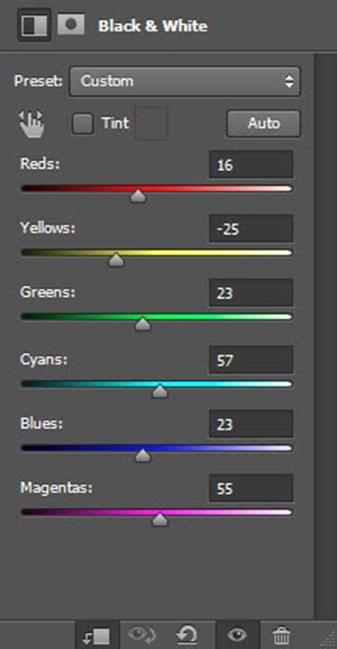
Add the following 3 adjustment layers as clipping masks to the model layer:
Black and White
Layer mask on the black and white adjustment layer:
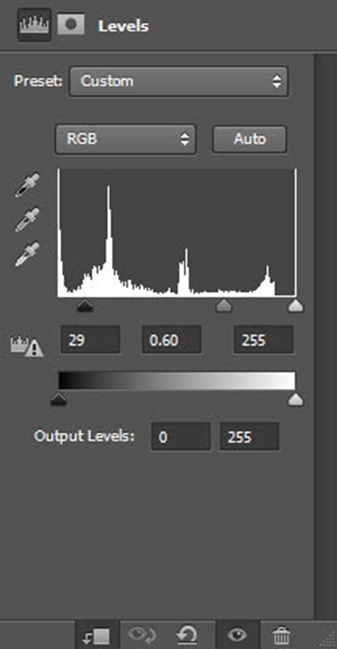
Levels
Layer mask on this Levels adjustment layer:
Curves
and here is the effect so far:
Step 4
This is the fun part of this tutorial 🙂 Let’s grab this “Round Fan Stiff Thin Bristles” brush, make sure you set the brush setting according to the screenshot below (click to enlarge):
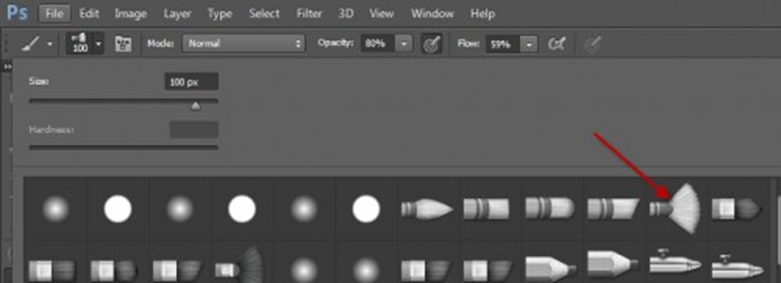
Use this brush to paint some pattern on a new layer, to the area shown below:
We can also grab this “Round Paint Stiff” brush and paint something on a new layer:
Use the liquify filter to warp this painting so it forms a flowing pattern:
Attach this to the right eye as shown below:
Step 5
I decided to have a play with the hair area and add some effect to it. So I used the Quick Selection Tool with a 10px size setting:
Draw a selection of the hair area:
Fill the selection with white colour and use a soft eraser to remove the top portion of this fill, as shown below:
Change the blending mode to “Overlay”, slightly reduce the layer opacity to around 90%:
Duplicate this layer once and keep its blending mode as “Overlay”, move it down a bit to the forehead area:
Step 6
Ok we’re almost done. For some final touches, I painted some particles aroudn the model with the debris brush we downloaded earlier (make sure you reduce the brush size before you paint):
To add some more colour into the image, I added a Vibrance adjustment layer with the following settings:
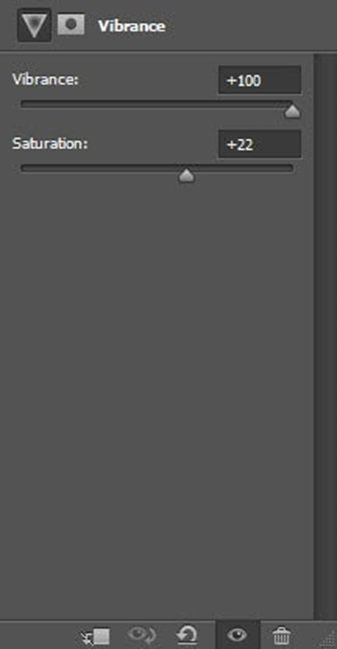
and here is my final effect: (click to enlarge)
That’s it for this tutorial! Hope you enjoy it and find it useful! Till next time, have a great day!

