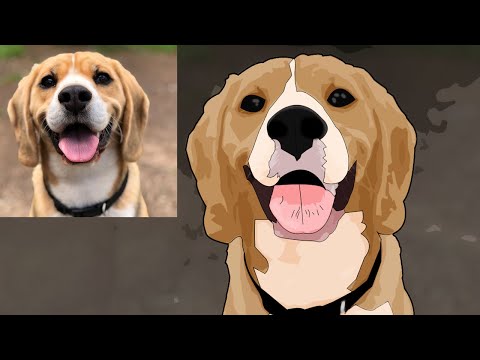
Step 1
Open your image in Photoshop.
Step 2
In the Layers Panel, click on the padlock icon to unlock the layer.
Step 3
Go to Layer > Smart Objects > Convert to Smart Object.
Step 4
Go to Filter > Blur > Smart Blur. Apply the following settings and click OK.
Step 5
Go to Filter > Filter Gallery. Locate the “Poster Edges” effect under the Artistic tab, apply the following settings and click OK.
Step 6
Go to Filter > Stylize > Oil Paint. Apply the following settings and click OK.
Step 7
Go to Filter > Sharpen > Unsharp Mask. Apply the following settings and click OK.
Step 8
Go to Filter > Blur > Smart Blur. Apply the following settings and click OK.
Step 9
Go to Filter > Filter Gallery. Locate the “Cutout” effect under the Artistic tab, apply the following settings and click OK.
Step 10
Click on the arrow down of the Layers Panel to reveal the layer effects and double click on the “Edit Filter Blending Options” icon on the first effect on the list.
Step 11
In the Blending Options window, set the Mode to “Hard Light”, bring down the Opacity to around 70% and click OK.
Step 12
Go to Filter > Stylize > Oil Paint. Apply the following settings and click OK.
Step 13
Double click on the “Edit the Filter Blending Options” icon on the first effect on the list.
Step 14
Set the Mode to “Overlay”, bring down the Opacity to around 30% and click OK.
Step 15
Click on the “Create New Fill or Adjustment Layer” icon in the Layers Panel, from the dropdown menu select “Levels” and set the Midtone Input Level to 1,5.
Step 16
Lastly, bring down the Levels layer Opacity to 40%.
Some Final Notes:
As we first converted the image into a Smart Object, is easy to use this effect on any other image. Simply double click on the layer thumbnail, in the new opened document place your image, save and close the smart object and you will have your new image with a cartoon effect without effort.

