Step 1
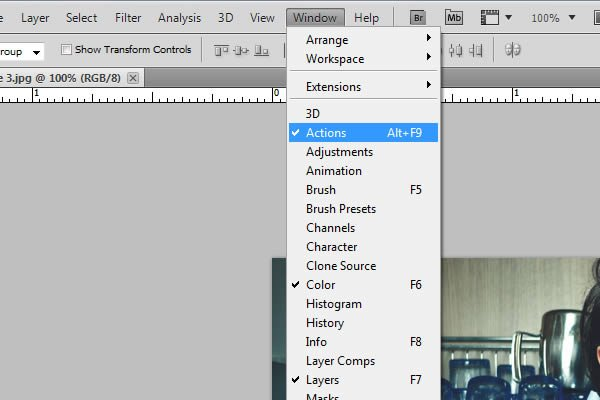
Begin by opening your images and navigating to the Window Tab of Photoshop. In the Window Tab click Actions (Alt+ F9). Once you have opened the actions panel you can begin creating your first lomo leak.

Step 2
Now that you have the actions panel open, we can begin our first light leak. Start by clicking the “new action” icon on the panel and title your photo action. Once titled, begin adding effects.
Step 3
For the first effect we will add Curves. Try to replicate the image shown as best as possible. It does not have to be exactly the same.
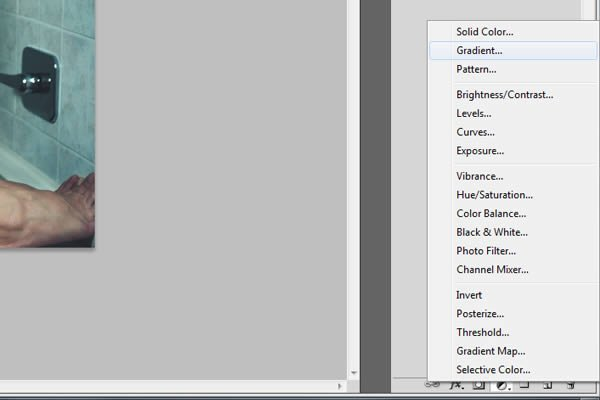
Next add a Gradient from the “fill or adjustment layer”

.
Change the color to “fc2c2c”, then change the angle to -100. The rest of the gradient can stay the same, just click ok.
Now change the layer style to Screen and lower the opacity to 90%.
Step 4
Now to wrap the action up, group the two adjustment layers, and name them “Effects”. Once finished click the Stop button and your action is complete.
Step 5
You can now run this action on any photo. Below, I have included a brief video to demonstrate how to install and run an action on a photo.
Conclusion
Add this action to your own photos and experiment with different colors to create beautiful light leaks and lomo effects! Also, the download files for this tutorial include 3 actions that you can apply to your own work.

