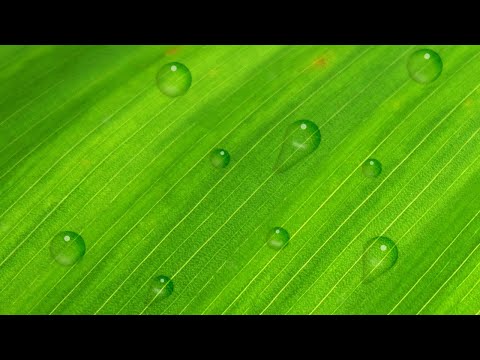
Step 1
In Photoshop, open the drawing or image you would like to apply water droplets to. For best results, make sure the image is at least 300 dpi.
Step 2
Create a new layer on top of your image, and use the Elliptical Marquee tool (M) to draw a circle while holding down the shift key. Use the Eyedropper tool (I) to select the lightest color in your image, and fill your circle with that color.
Step 3
If you don’t want a perfectly round water droplet, select the layer your circle is on, and go to Edit > Transform > Warp. You can then manipulate the circle to create a more flattened or oblong shape. When you have a shape you’re happy with, hit Enter to save it.
Step 4
With your droplet layer selected, reduce the layer Fill to 0%. Though your droplet is no longer visible, the shape still exists within the layer.
Step 5
Next, at the bottom of your Layers palette, click on the “fx” item, and select Drop Shadow. Set your opacity to 70% and the angle to 45 degrees. Adjust the distance to 10 pixels and the size to 5 pixels. Depending on the image that you’ve chosen, you may want to adjust the angle to cast the droplet shadow in a natural location based on the photo’s lighting.
Step 6
With the Layer Style window still open, select Inner Shadow. Set the opacity to 40% and the angle to 30 degrees. Set the distance to 1 pixel, the choke to 8%, and the size to 5 pixels. Once applied, this shadow gives depth to the droplet and starts to give it a 3D appearance.
Step 7
In the Layer Style window, select Outer Glow. From the Blend Mode menu, select Multiple, then set the opacity to 20% and noise to 0%. Be sure the color selected is black. Under the Elements section, set the glow size to 5 pixels. You’ll see that this effect creates a small exterior shadow around your droplet.
Step 8
Still working in the Layer Style window, adding an Inner Glow begins to give the droplet some depth, by making the center appear darker than the exterior surfaces. Choose Multiply blend mode and set the opacity to 20%, again with a black color selected. Set the glow source to Center, and change the size to 40 pixels.
Step 9
To give our droplet a watery glow, we’ll also add a Gradient Overlay in the Layer Style window. Set the opacity to 75%, and then click on the Gradient color bar (on the colors themselves, not the drop-down button) to open the Gradient Editor panel. Click on the bottom-left stop and select a light yellow or white color (or the highlight color you used in Step 2), then select the top-right stop and set the location to 48%. Hit OK to close the Gradient Editor window.
Step 10
Back in the Layer Style window, set the opacity to 55% and change the angle to 55 degrees.
Step 11
To add extra definition to the image seen through the droplet, we’ll add a Pattern Overlay, as well. In the Layer Style window, select Pattern Overlay, and choose Overlay as the Blend Mode. Reduce opacity to 30%, and select a dark neutral pattern like Blue Dust (a Photoshop present pattern). You can now click OK to close the Layer Style window.
Step 12
To put the finishing touches on our droplet, add another new layer to your file and add a few white highlights to the top-right edge with a small (6-10px) Brush tool (B).
Step 13
If your water droplet falls over text or a distinct image, you can also add a fisheye effect to mimic the lens reaction to water. To do this, hold down Control, and click on the droplet layer in your Layer palette to select your droplet shape. Next, select the layer you want to manipulate (the image or text layer beneath the droplet) and click Control+T to enable the Transform tool. Right-click on the selected area, and click on Warp in the menu.
In the Warp menu at the top of your screen, click on the dropdown menu and select Fisheye, which will curve the image below your droplet just like water naturally does.
You can duplicate your droplet layer and resize to create multiple drops of water, or start the process over from scratch to create each drop uniquely. Also try playing around with varying shadow sizes and colorings to get slightly different effects. Here’s my final image laid over text to display the full effect.

