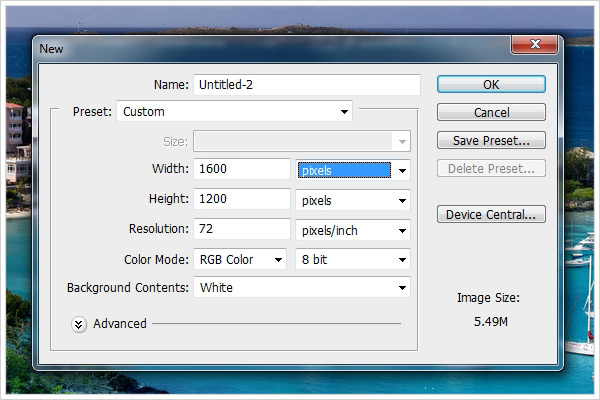
1. Create a new document. Size 1600×1200, 72 DPI.
2. Open the document with canvas fabric.

3. You need to zoom out 2 times to make more folds on the fabric. Duplicate the layer and move them both side by side, as shown in the figure below.
4. The transitions between the layers are ugly, we can make it correct. Take the Eraser Tool :
and make the transition smoother.
5. Let’s change the main picture. Open the image. It’s too much sky here, so we need to move the picture up a little bit to make some empty space at the bottom.
6. Next step, we need to add a little bit sea in this area. You can make it with Clone Stamp Tool (S) . Here’s the result:
7. Go back to the file with layers of fabric and drag on the image to the sea. We need to merge the layers with sea and fabric into one (Layer-Merge Down).
8. A layer of fabric sn black&white, so we needs to add some color. Use the Color Overlay from the Blending Options (Add a layer style – Blending Options – Color Overlay).
The color #115f68.
9. Take the Eraser (Hotkey – E) with the following settings and erase part of the fabric and you would get soft and realistic transition with water.
10. It should look like this:
11. The color of water is natural, but it is better to make it deeper. Create a new layer (Layer – New – Layer or hotkey – Shift + Ctrl + N). Name it “blue”.
12. Take the Brush (size 500 px) and fill the part of the screen, as it shown on the picture. Type of mixing for a layer “blue” is Soft Light.
13. Apply the Create Clipping Mask (hotkey – Alt + Ctrl + G) to the layer with tissue.
14. Apply the same effect to the water in the main photo. The imposition will be not on the water only, but on the boats as well.
15. You need to take the Eraser (size 10 pxs) and erase part of the layer above the boats. Then make the eraser bigger and erase the part of the blue layer above the ground.
16. We need to work on the fabric as well. Select the layer “blue” and the layer of fabric, add them both to the folder (hotkey – Ctrl + G), and make a duplicate merge layer (hotkey – Ctrl + E).
17. Move this layer above the rest and apply the Create Clipping Mask (hotkey – Alt + Ctrl + G).
18. Add effect Gaussian Blur to this later (Filter – Blur – Gaussian Blur).
19. We need make the bottom of the fabric darker. Create a new layer, take a Brush (Size: 350px, Hardness: 0%, Color: # 000000) and hold down Shift, draw a horizontal bar at the bottom of the screen. Set the opacity to 55%.
20. We need to restyle the main image a little bit. Make a duplicate layer and move it up above the other layers. Apply a Gaussian Blur effect to this layer.
21. Take the Eraser (Size: 175 px, Hardness – 0%) and delete everything to the second level of the coastline.
22. We have finished the main task. Take the Eraser Tool (size: 90px, hardness – 100%), select the layer with a fabric and remove the part of the fabric as shown below.
23. Create a new layer and move it below the others. Take any picture of the table you like and substitute it for the fabric.
24. Add a shadow on the fabric. Create a new layer, move it under the layer of fabric, take the Brush (Size: 45px, hardness: 0%, color: # 000000) and draw the shadow. It should look like this:
25. You can experiment with a picture as you like. You can add text, more boats, a lamp on the table, etc.

